
Final Project: Unmasking Mask
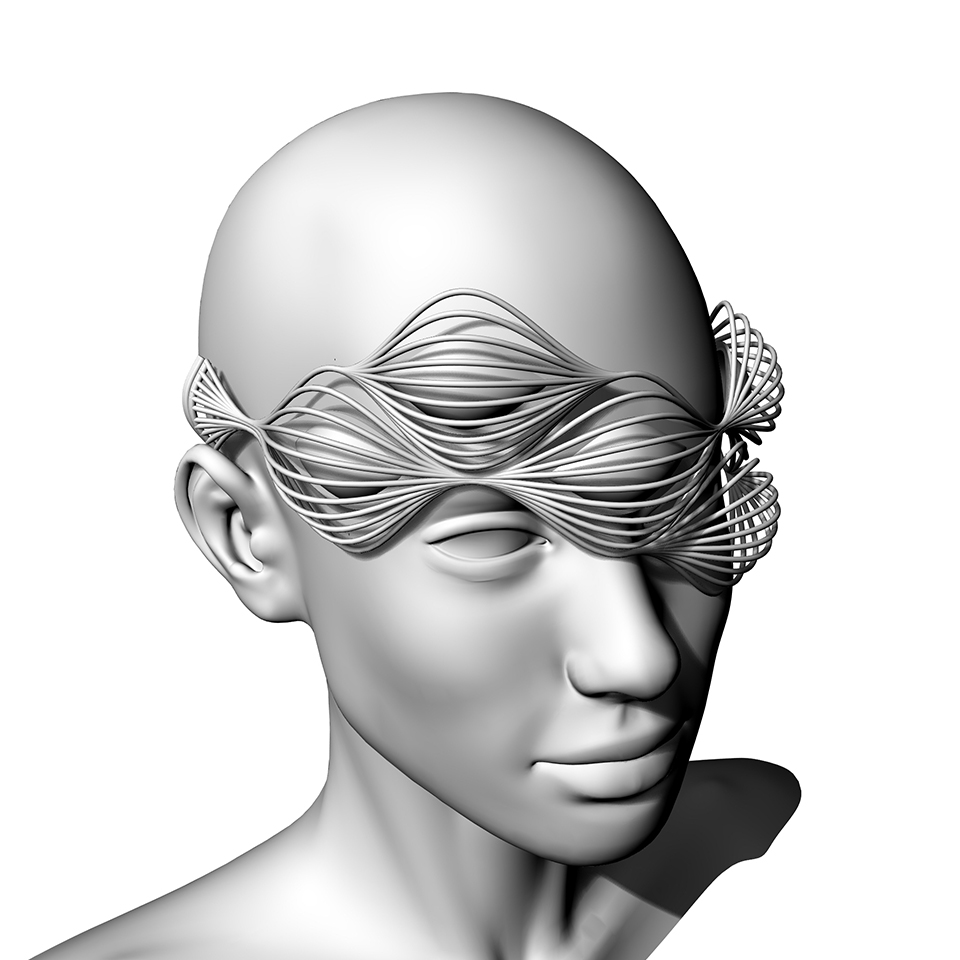
For my final project, I’m finally making the “UNMASKING MASK”. Unmasking mask is not a usual mask. Instead of disguising, this mask actually exposes your inner feelings and thoughts. This mask forbids you from lying!! And if you’re a shy and a little bit introvert, like me myself, this mask lets you communicate with outer world without needing to speak. You can tell the others around you that you are focused on something, you are anxious, you are relaxed, or you are distracted! Also, you can call it an “Honesty Mask”. Wearing it, you can never lie again about being attracted to another one’s speech! The mask will expose whatever your real mind state is.
Process:
The final project is an integration of skills I’ve learned, and also a little bit of projects I done throughout the semester. I have been working on my final project since “Output Devices” week, so I almost had the electronics and programming parts figured out.
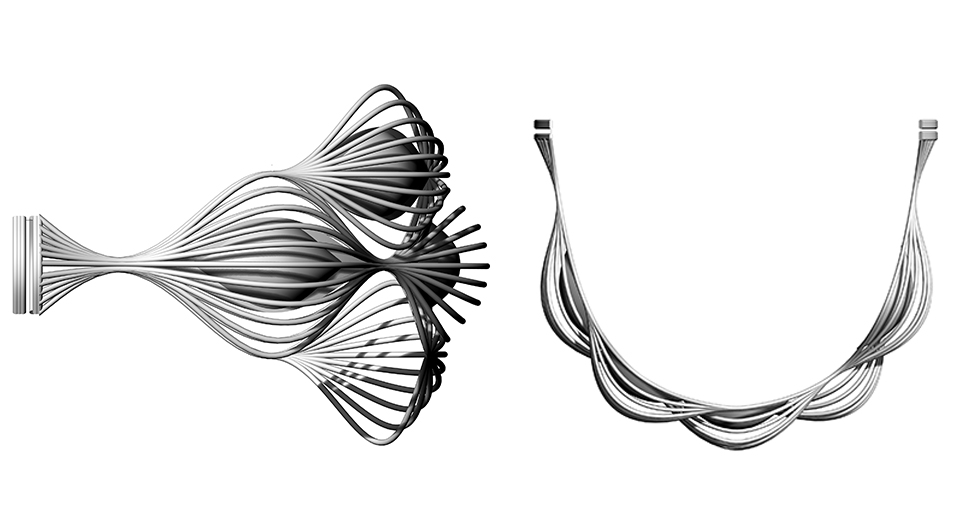
Design:
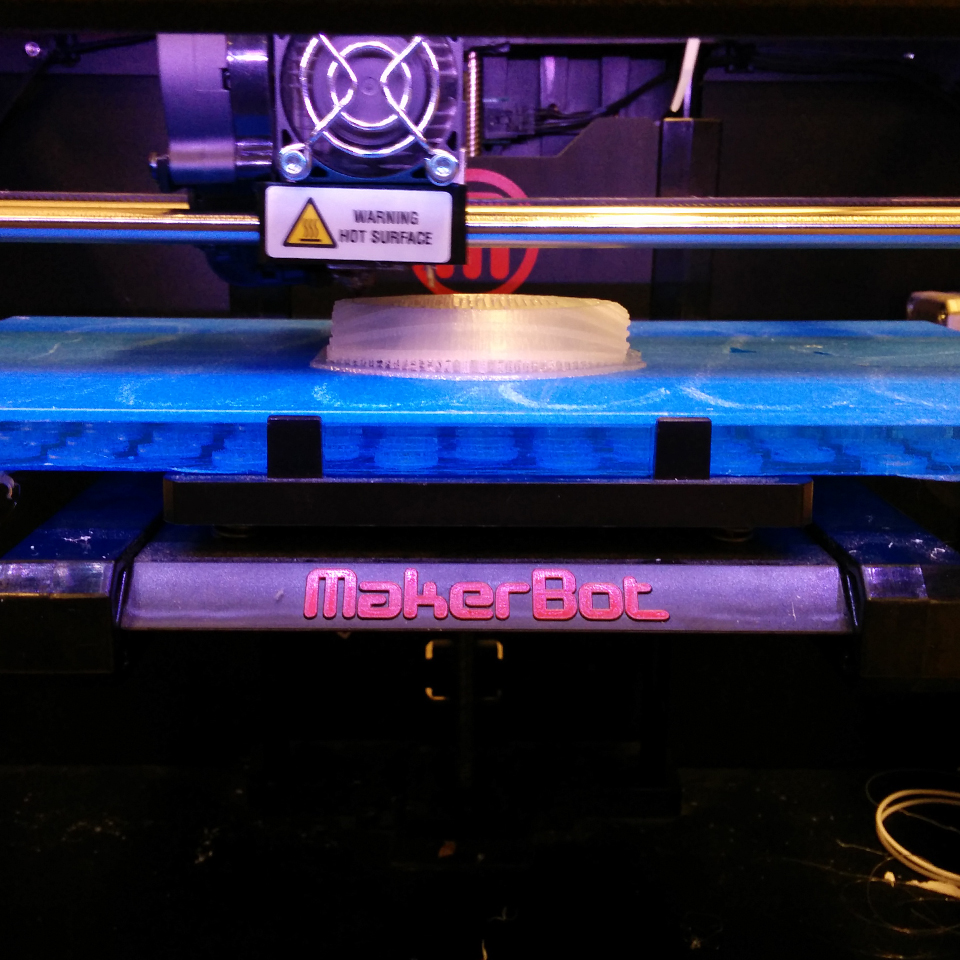
I used Rhino for designing my mask. I gained the experience of designing and 3D printing wearables in Week 3 assignment, so I knew what I wanted – and what I should do before starting the design of the mask. For 3D printing the main part, I used ABS printer in the ArchShop. For printing the LED diffusers and the board-holder boxes, I used semi-transparent filament and printed these parts with MakerBot.
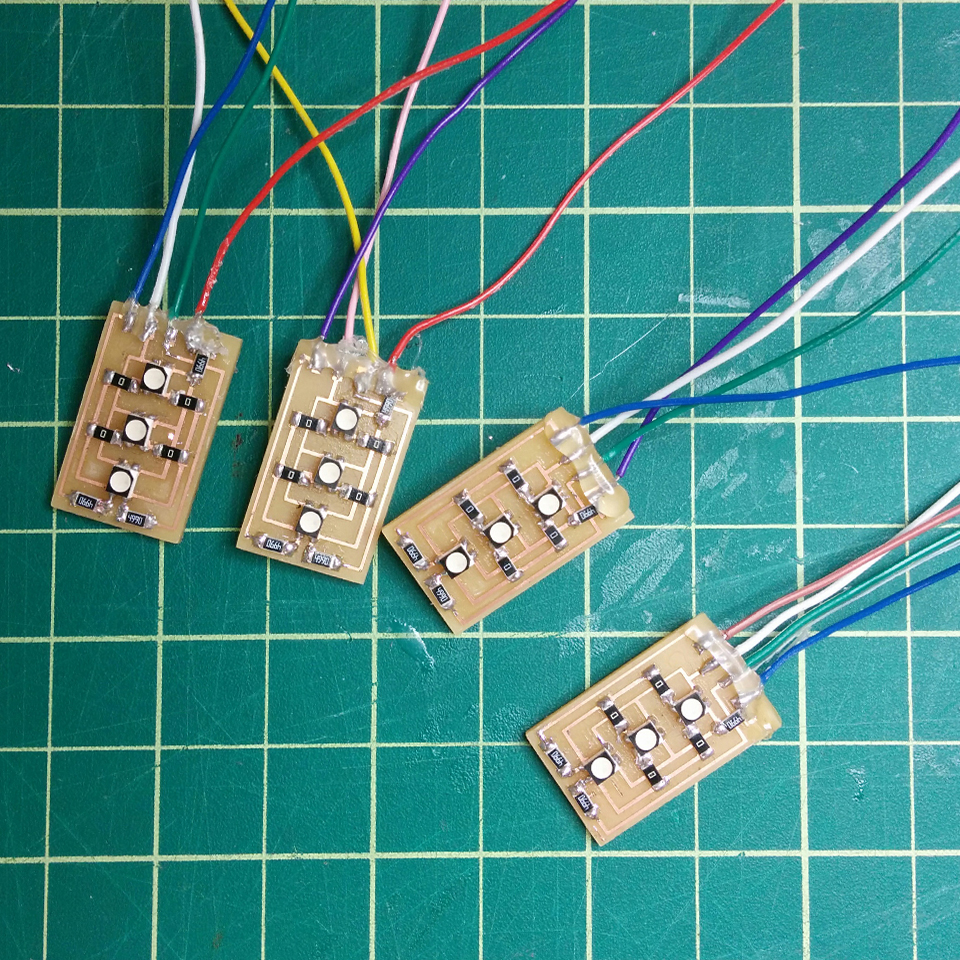
Electronics:
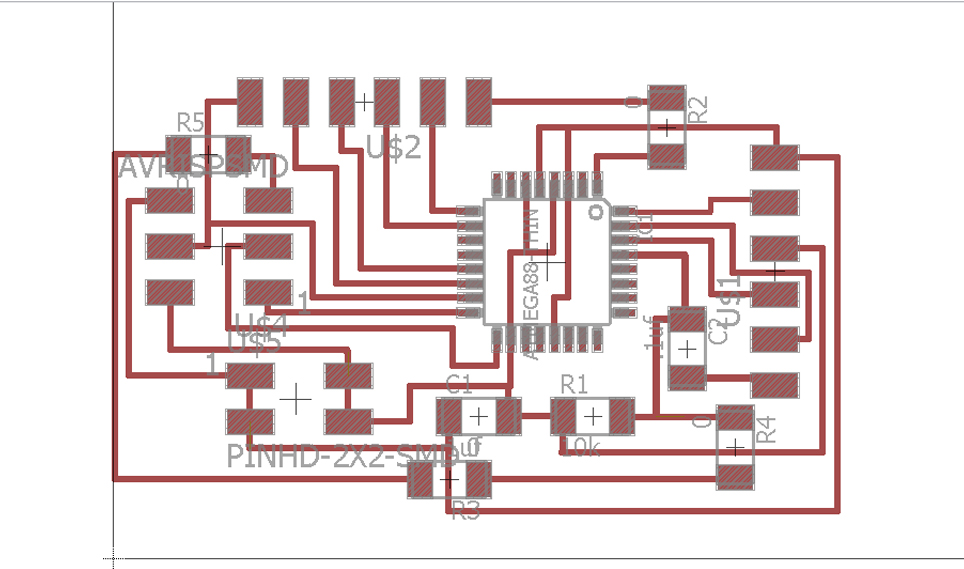
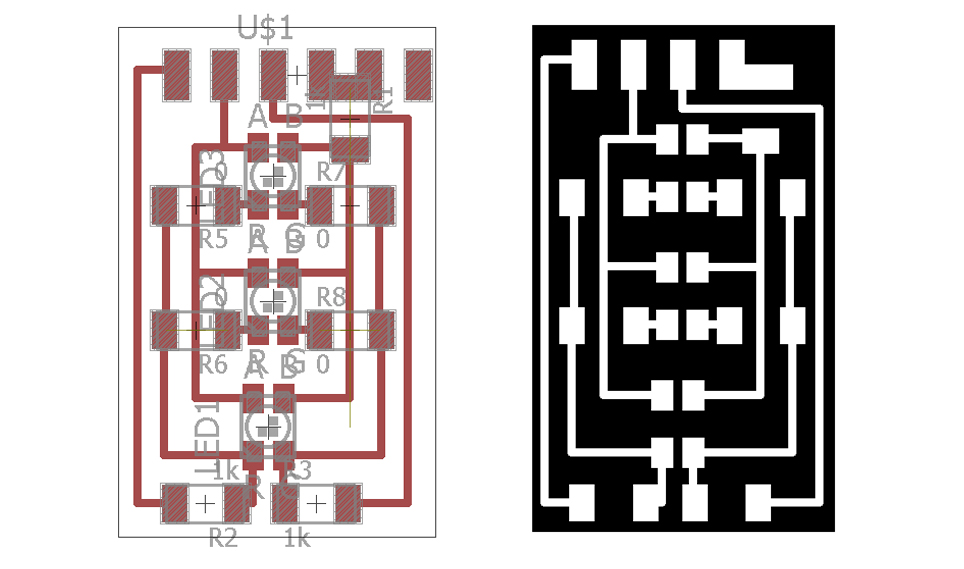
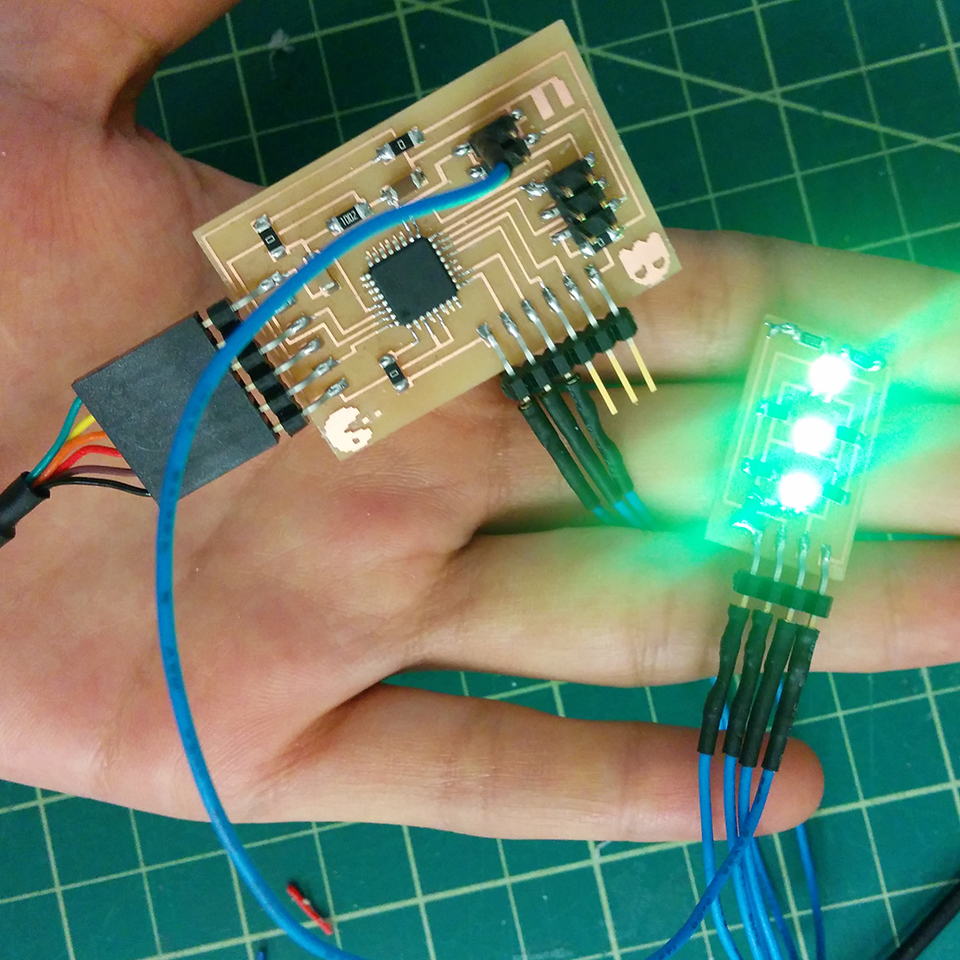
The electronics part is an integration of EEG sensor, which I got by hacking into an EEG toy, and also RGB LEDs attached to PMW pins that change color with the data coming from EEG. For visualizing two measurement of “Attention” and “Meditation”, I needed two sets of LED, which will need all 6 PMW pins of ATMega328P. I also needed some tiny LED boards to be attached on my mask.

Embedded Programing:
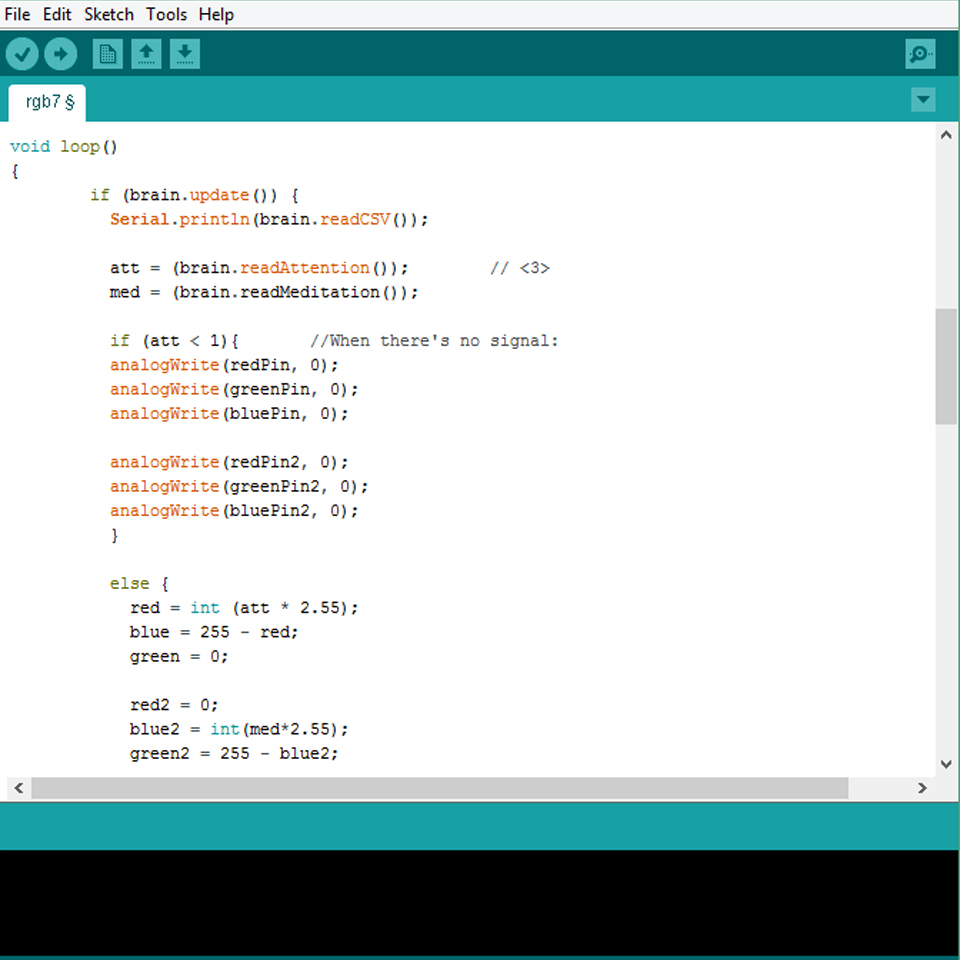
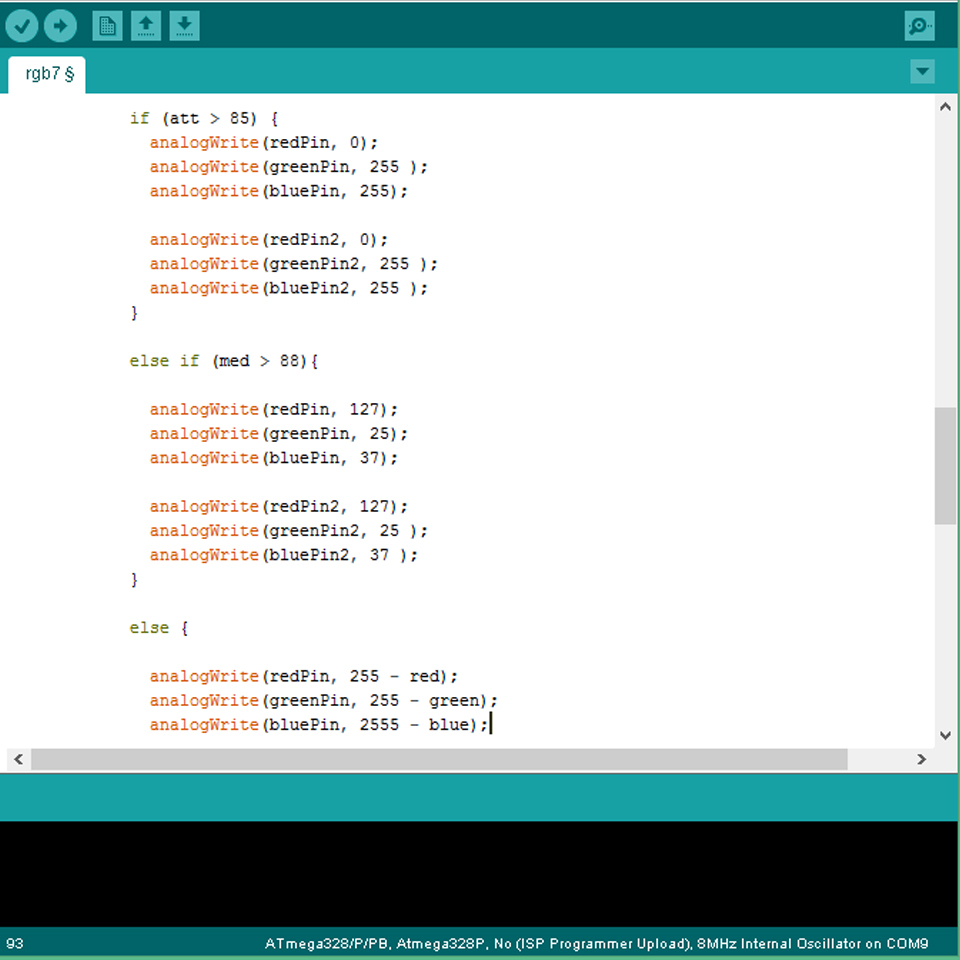
Main part of the program was the translation between serial data from EEG and RGB colors for LEDs. The main part of the code is shown below:
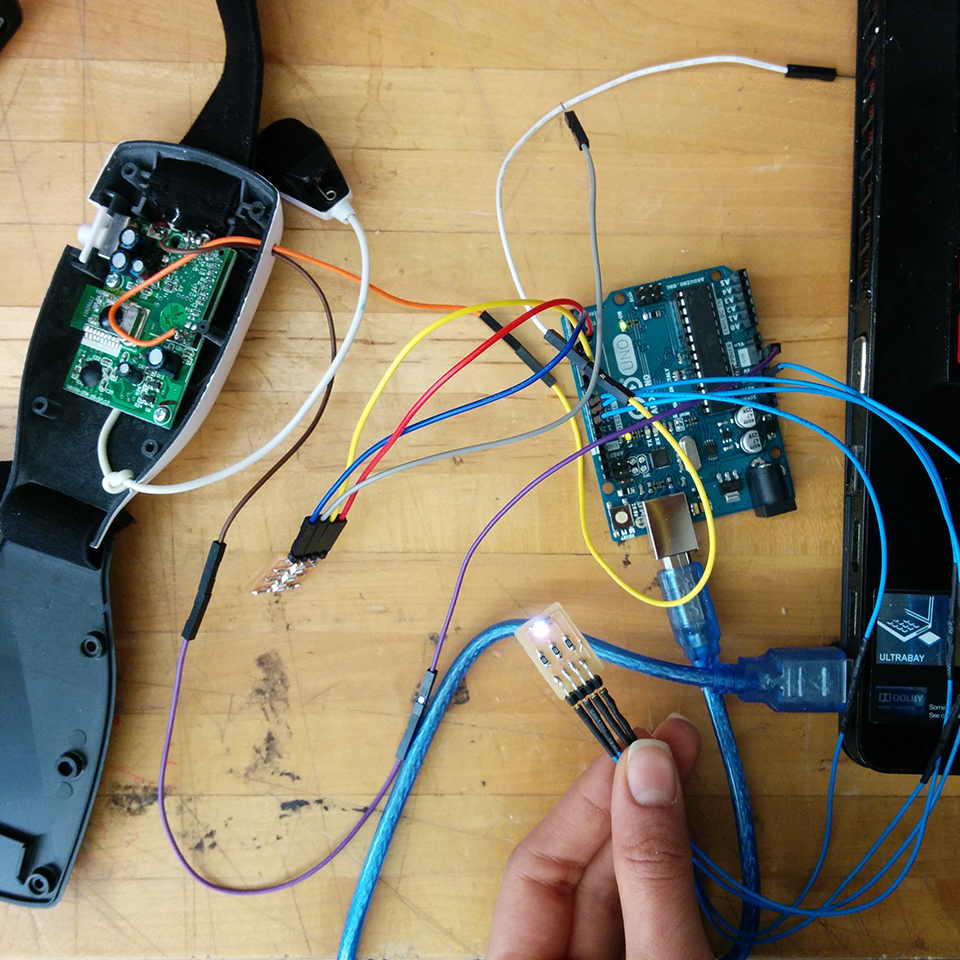
Broken Board … Broken Heart
So far, everything was working perfectly. I was getting the serial data from EEG through Neil’s Hello-Arduino board since the Input Devices week, and I had designed my own board according to that. On Thursday, I went to Media Lab to talk with TAs about the slight noises I was getting from time to time with my serial communication, but overall everything was working pretty well. However, I broke the FTDI header of the board I was using, which tore off the traces, and when I remade the board, I wasn’t able to get the serial data from it. I thought there was something wrong with the soldering, so I remade the board… then, I decided to give Hello-Arduino another try, I made that board again, but nothing was working. I did everything as I was doing for the past couple of weeks- same program, same board design, …- but in less than 4 days to the presentation day, I was left with nothing in my hand. After spending two days trying to debug the problem by myself and the help of TAs, I decided to buy an Arduino board and get my project going. I will definitely get back to this board – maybe the whole thing was the effect of anxiety of getting so close to deadline and there is a stupid mistake that I just can’t see right now.
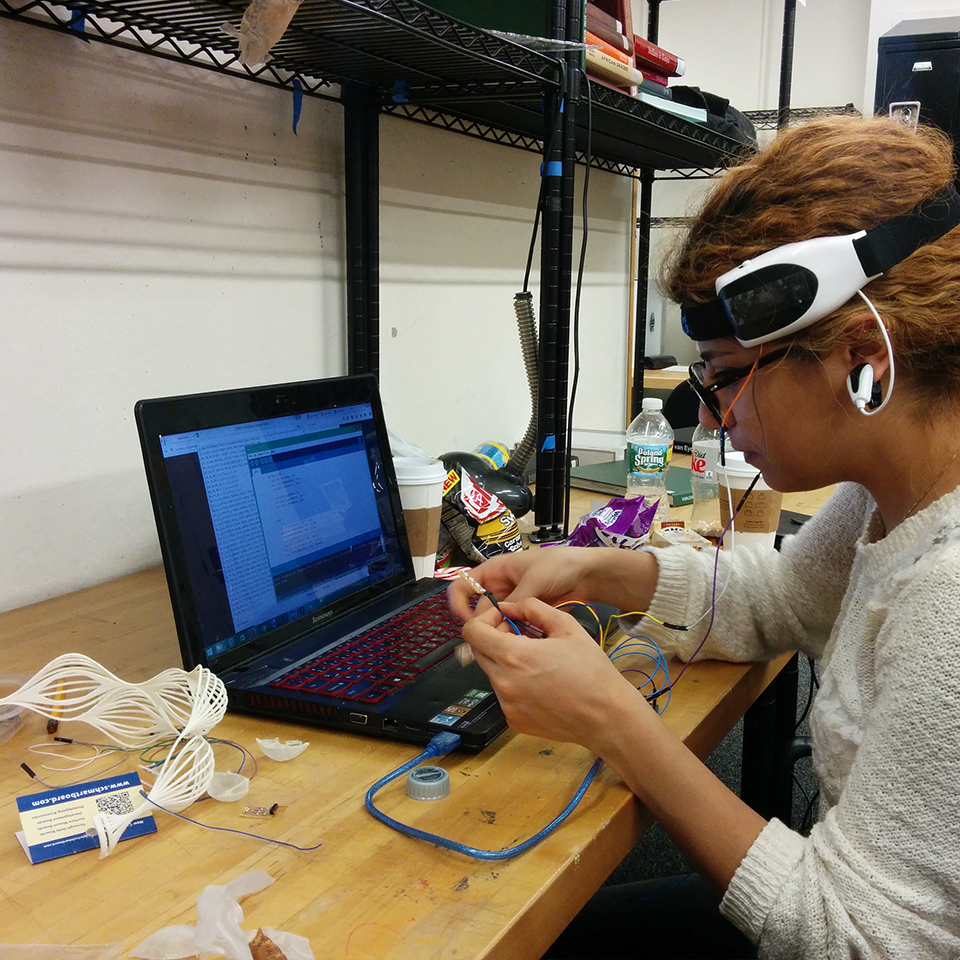
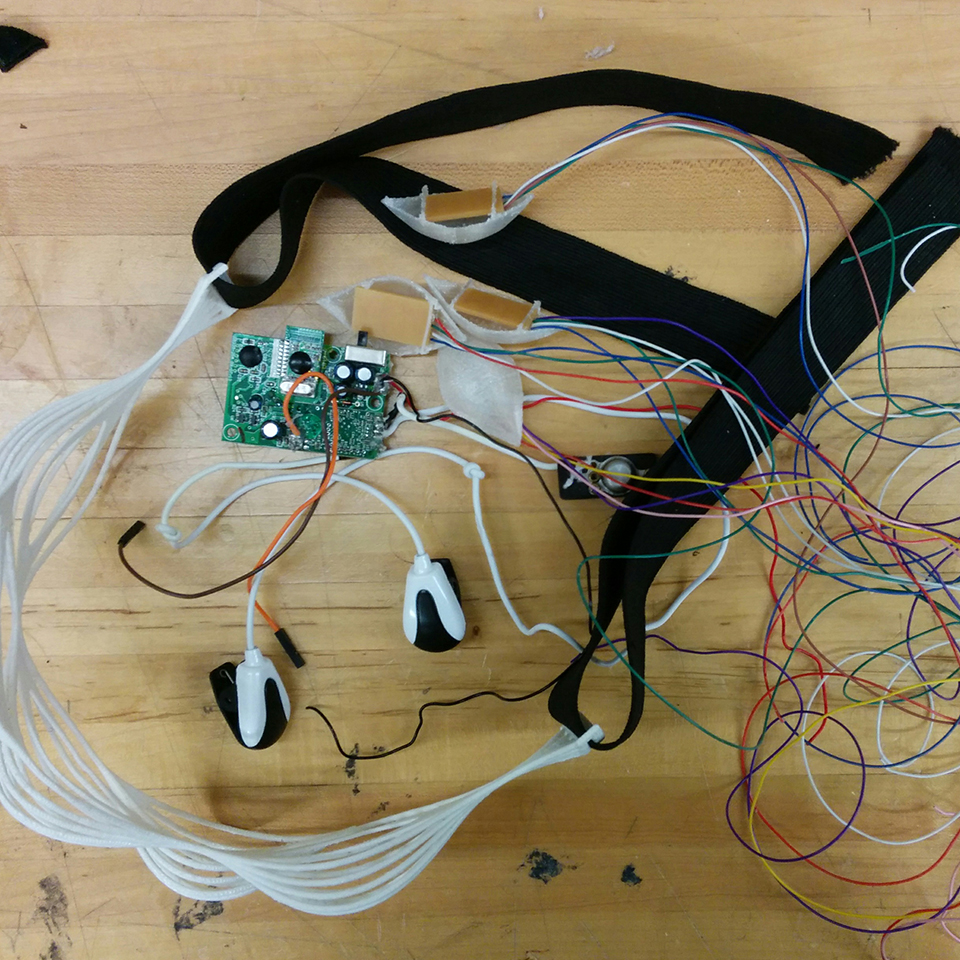
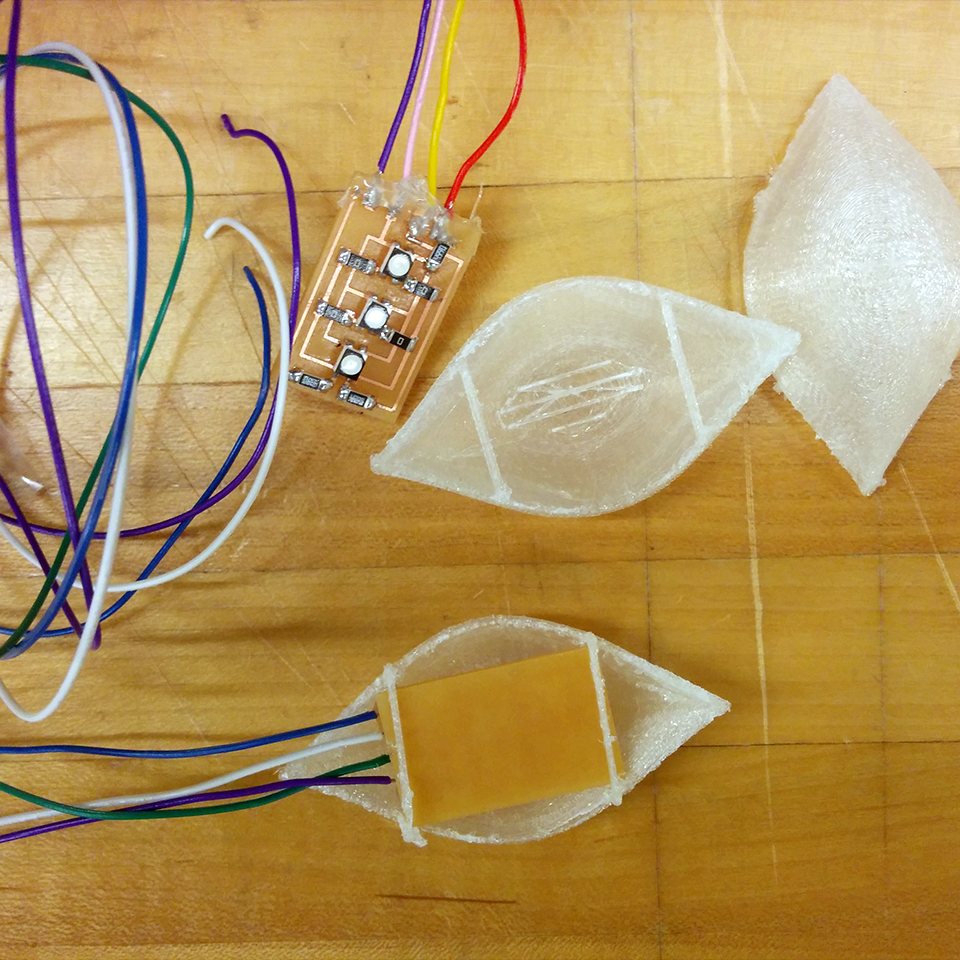
Fabrication process: gathering the parts
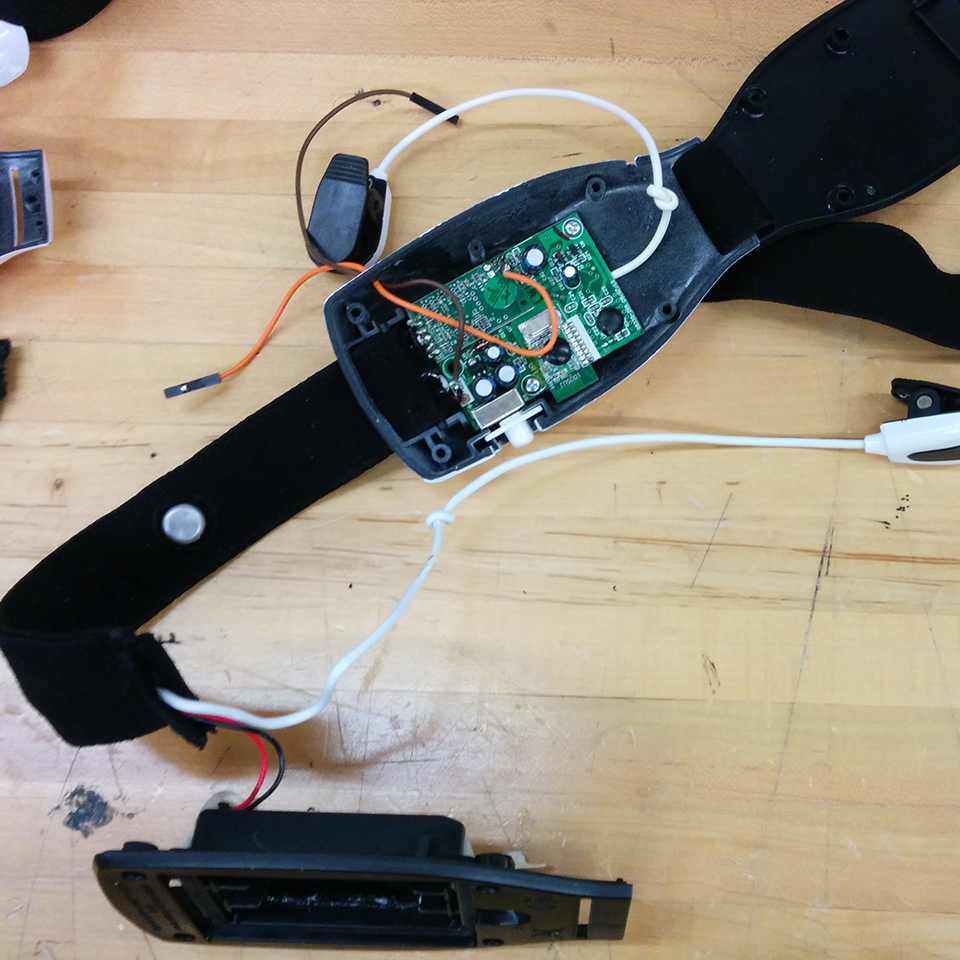
3D printing the mask, milling and stuffing the boards, and taking out the main board and EEG sensors from the hacked EEG headband I’ve been using so far was the main thing to do at this step.
Assembling the parts: not as easy as it sounds!
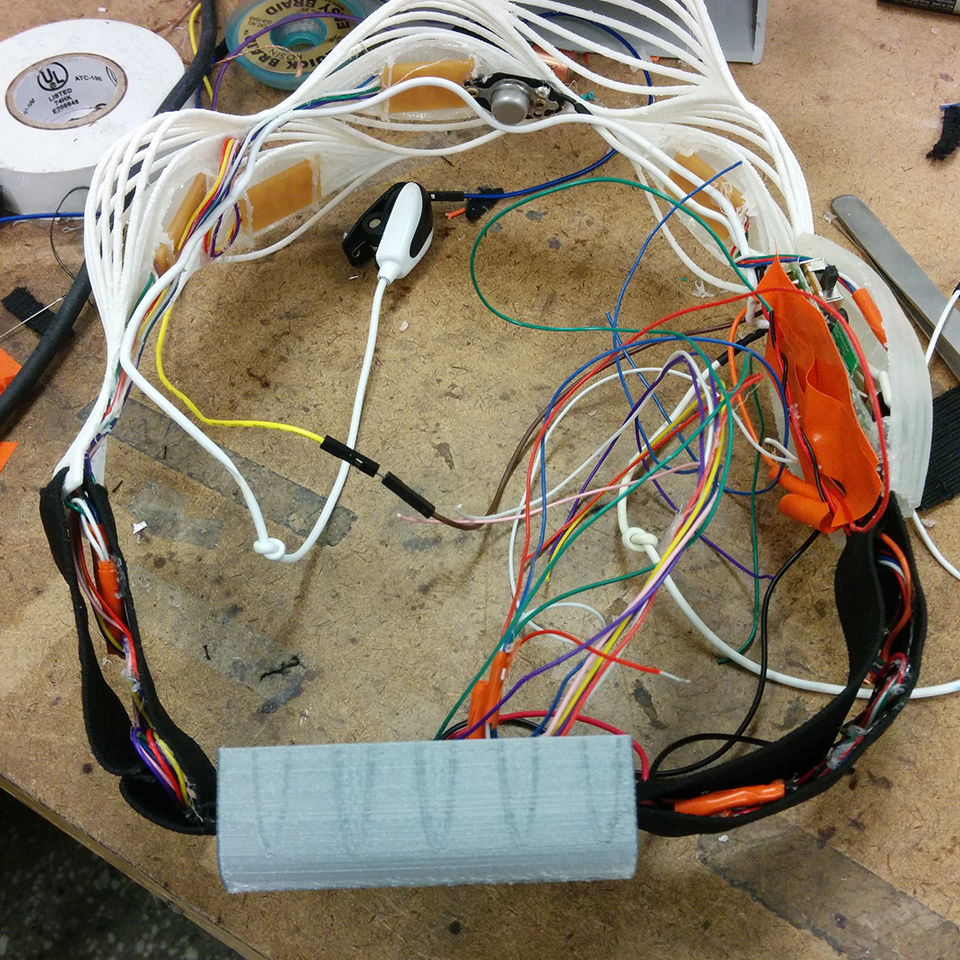
Making a wearable is trickier than it sounds: you want a clean, beautiful final product, and for the product to be a working EEG headband, there is a huge amount of wires, sensors, PCBs, and etc. gathering all the parts together and assembling them in the way that it doesn’t affect the aesthetics of the final artifact is really hard! Also, there were some considerations regarding the performance of EEG. For example, the EEG board should be separated from the main board to prevent signal noises from interfering with EEG data.
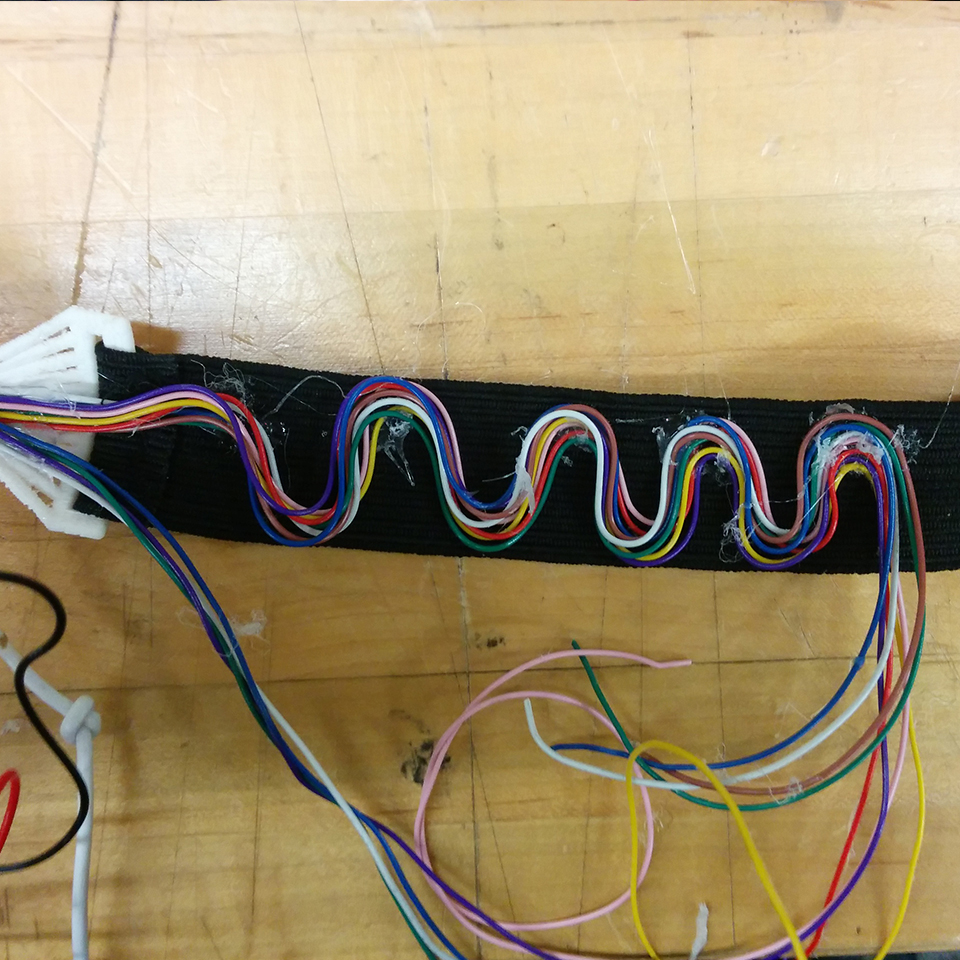
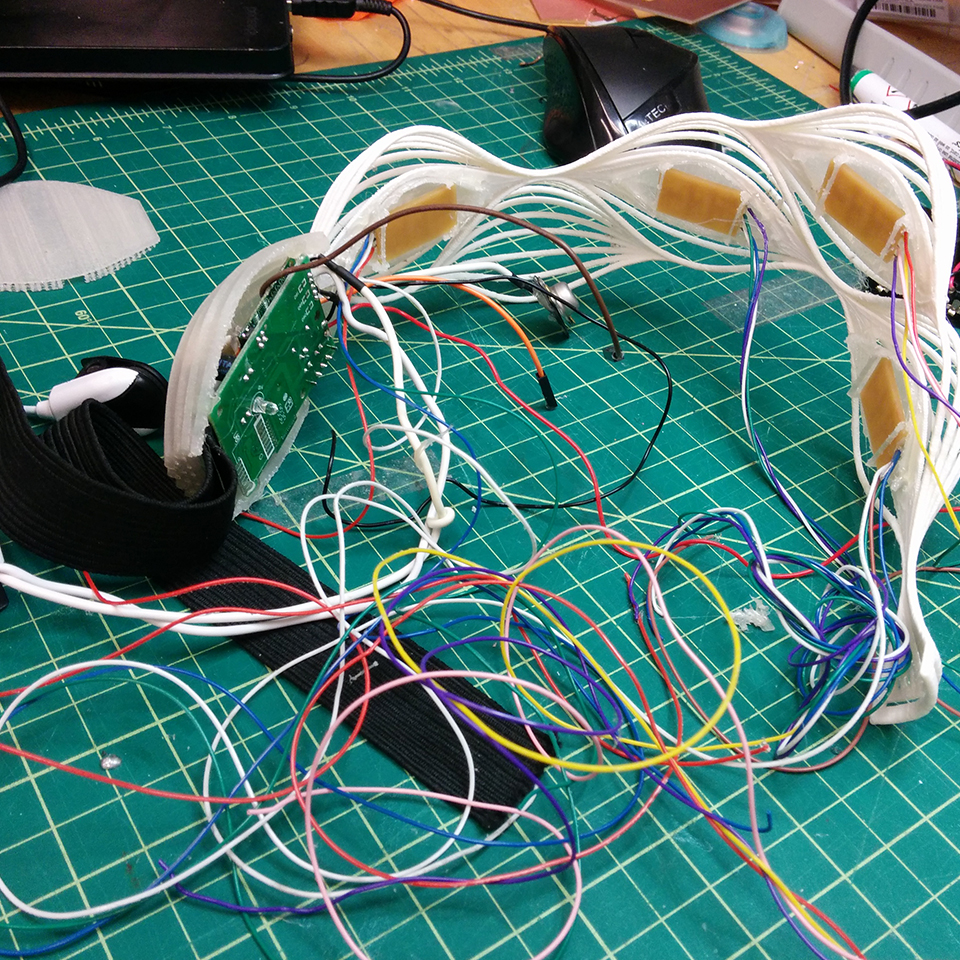 All the tiny details in making a wearable were great challenges in the fabrication process. For example, I attached the wires in a waved pattern to the rubber band, so that the elasticity would be preserved. Or, there should be no unshielded wire next to the EEG electrode, and that made the whole wiring of the LEDs more complicated. Also, you want every part to have a nice and clean finishing, and also for the whole wearable to be light weight and comfortable. These challenges were the ones I didn’t take account for at the beginning of the project, and each were a challenge that I really enjoyed facing.
IT WORKS!
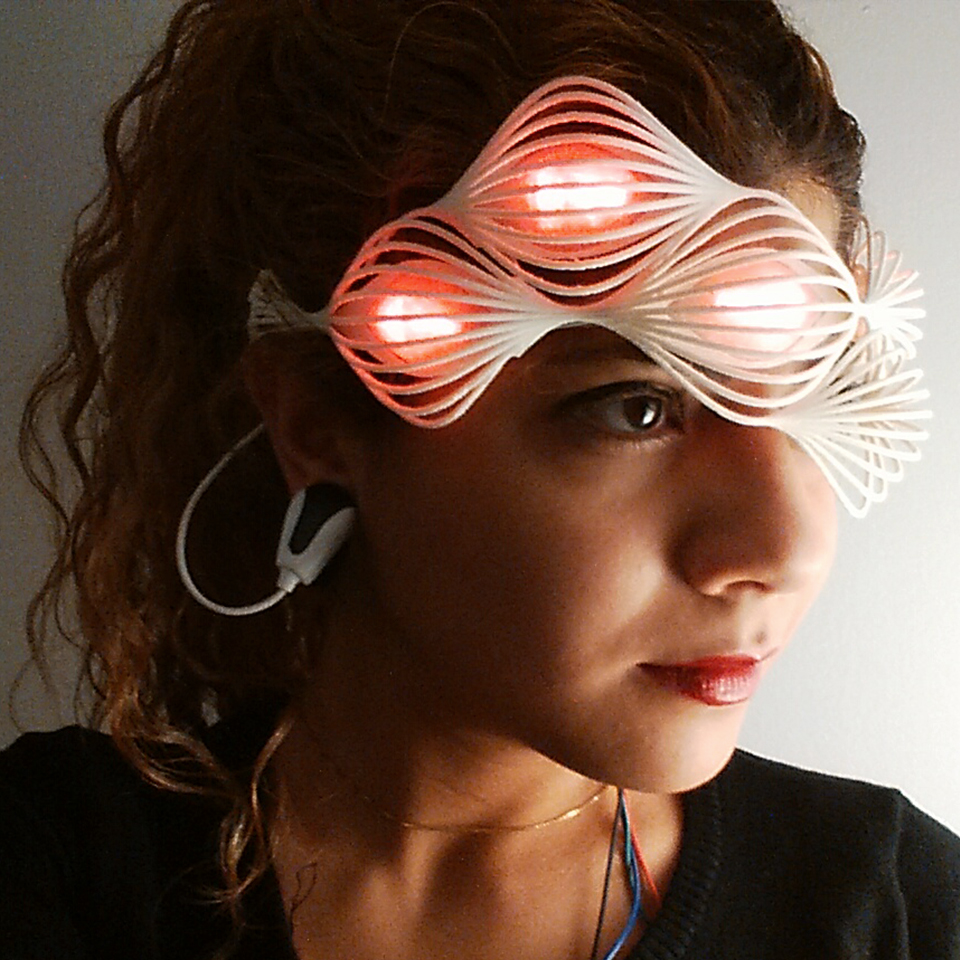
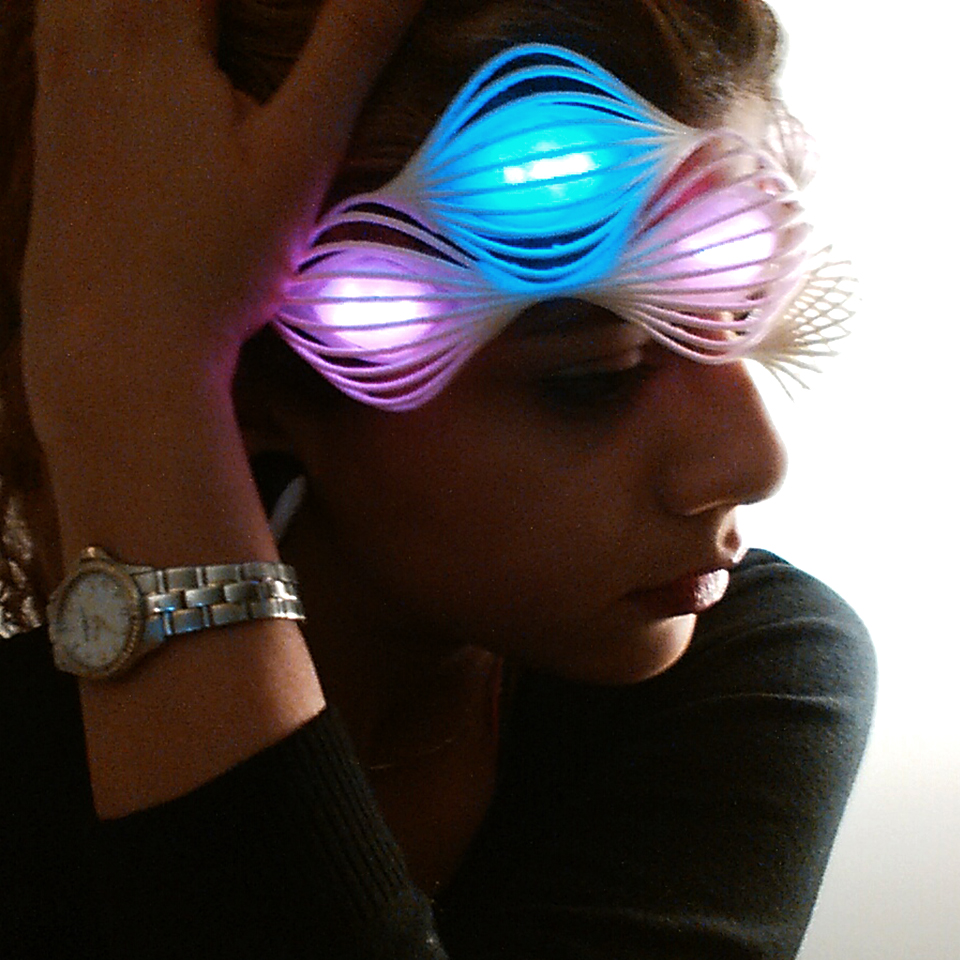
These are the pictures of me wearing the “Unmasking mask”. It works perfectly!! When the lights red, it means I’m in the attention mode – I’m fully focused on something. Moving from red to blue is moving from complete attention to the relaxation. Purple is neutral, and the level of redness is the level of attention. Three LED’s on the forehead works with this algorithm. The top LED, However, is the indicator of the level of relaxation. It ranges between Blue and Green: Blue is the complete relaxation, and the pure green on the top corner LED means complete lack of relaxation – pure anxiety! Having these LEDs on my face, people would know how I feel without needing me to say anything … which was the whole point from the beginning!
I used Rhino for designing my mask. I gained the experience of designing and 3D printing wearables in Week 3 assignment, so I knew what I wanted – and what I should do before starting the design of the mask. For 3D printing the main part, I used ABS printer in the ArchShop. For printing the LED diffusers and the board-holder boxes, I used semi-transparent filament and printed these parts with MakerBot.
Electronics:
The electronics part is an integration of EEG sensor, which I got by hacking into an EEG toy, and also RGB LEDs attached to PMW pins that change color with the data coming from EEG. For visualizing two measurement of “Attention” and “Meditation”, I needed two sets of LED, which will need all 6 PMW pins of ATMega328P. I also needed some tiny LED boards to be attached on my mask.
Embedded Programing:
Main part of the program was the translation between serial data from EEG and RGB colors for LEDs. The main part of the code is shown below:
Broken Board … Broken Heart
So far, everything was working perfectly. I was getting the serial data from EEG through Neil’s Hello-Arduino board since the Input Devices week, and I had designed my own board according to that. On Thursday, I went to Media Lab to talk with TAs about the slight noises I was getting from time to time with my serial communication, but overall everything was working pretty well. However, I broke the FTDI header of the board I was using, which tore off the traces, and when I remade the board, I wasn’t able to get the serial data from it. I thought there was something wrong with the soldering, so I remade the board… then, I decided to give Hello-Arduino another try, I made that board again, but nothing was working. I did everything as I was doing for the past couple of weeks- same program, same board design, …- but in less than 4 days to the presentation day, I was left with nothing in my hand. After spending two days trying to debug the problem by myself and the help of TAs, I decided to buy an Arduino board and get my project going. I will definitely get back to this board – maybe the whole thing was the effect of anxiety of getting so close to deadline and there is a stupid mistake that I just can’t see right now.
Fabrication process: gathering the parts
3D printing the mask, milling and stuffing the boards, and taking out the main board and EEG sensors from the hacked EEG headband I’ve been using so far was the main thing to do at this step.
Assembling the parts: not as easy as it sounds!
Making a wearable is trickier than it sounds: you want a clean, beautiful final product, and for the product to be a working EEG headband, there is a huge amount of wires, sensors, PCBs, and etc. gathering all the parts together and assembling them in the way that it doesn’t affect the aesthetics of the final artifact is really hard! Also, there were some considerations regarding the performance of EEG. For example, the EEG board should be separated from the main board to prevent signal noises from interfering with EEG data.
All the tiny details in making a wearable were great challenges in the fabrication process. For example, I attached the wires in a waved pattern to the rubber band, so that the elasticity would be preserved. Or, there should be no unshielded wire next to the EEG electrode, and that made the whole wiring of the LEDs more complicated. Also, you want every part to have a nice and clean finishing, and also for the whole wearable to be light weight and comfortable. These challenges were the ones I didn’t take account for at the beginning of the project, and each were a challenge that I really enjoyed facing.
IT WORKS!
These are the pictures of me wearing the “Unmasking mask”. It works perfectly!! When the lights red, it means I’m in the attention mode – I’m fully focused on something. Moving from red to blue is moving from complete attention to the relaxation. Purple is neutral, and the level of redness is the level of attention. Three LED’s on the forehead works with this algorithm. The top LED, However, is the indicator of the level of relaxation. It ranges between Blue and Green: Blue is the complete relaxation, and the pure green on the top corner LED means complete lack of relaxation – pure anxiety! Having these LEDs on my face, people would know how I feel without needing me to say anything … which was the whole point from the beginning!
These are the pictures of me wearing the “Unmasking mask”. It works perfectly!! When the lights red, it means I’m in the attention mode – I’m fully focused on something. Moving from red to blue is moving from complete attention to the relaxation. Purple is neutral, and the level of redness is the level of attention. Three LED’s on the forehead works with this algorithm. The top LED, However, is the indicator of the level of relaxation. It ranges between Blue and Green: Blue is the complete relaxation, and the pure green on the top corner LED means complete lack of relaxation – pure anxiety! Having these LEDs on my face, people would know how I feel without needing me to say anything … which was the whole point from the beginning!